Do-it-yourself Grey-filter for long-time exposures
Uploaded 30. Oct. 2010
Photographers are
often concerned about retaining a fast enough shutter speed.
Whether
you want to catch a bird on the wing, freeze the movement of
a running
cheetah or just prevent camera shake in a low-light
situation –
you want your exposure time to be very short to avoid blurry
images.
Nevertheless, a bit of a blur can sometimes be quite
desirable;
landscape pictures
with blurred water movement are a great example. Rather than
freezing
the motion of each little wave and droplet with a short
shutter
speed, a longer exposure time transforms the water to a
smoothly
blurred surface.

With
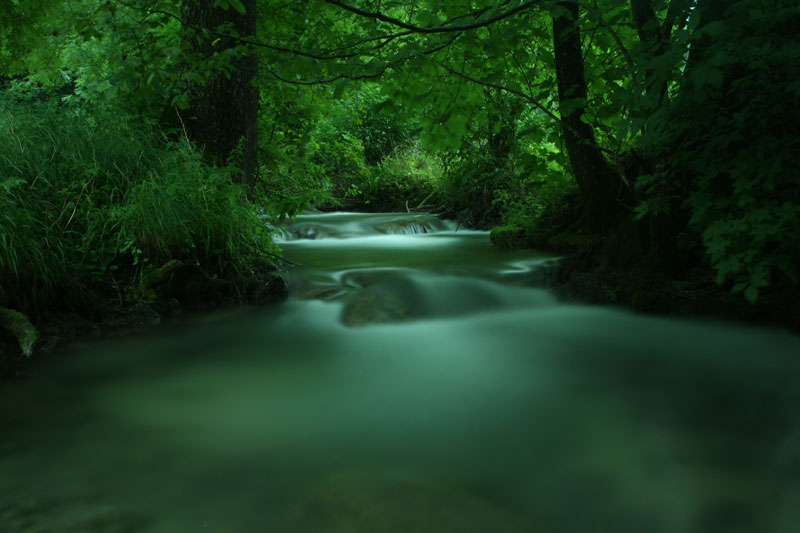
an exposure time of 30 sec. & f12, the water movement of
this small
creek gets evenly blurred. Germany 2010
In order to achieve
a long exposure time, you want to close your aperture (high
f-number) and choose a low (i.e. non-sensitive) ISO
speed. But
even in a dim-lit environment like the woodland creek
displayed
above, this is often not enough to allow an exposure of
several
seconds.
That’s where grey filters come in. Grey filters or ND filters (meaning neutral density) consist of coated glass or epoxy resin and can usually be screwed on to the front element of your lens. These filters block a big proportion of the available light which results in a longer exposure time, enabling photographers to get the intended motion blur. ND filters are available in various versions: ND 2 filters will transmit just 1%, ND 4 filters 0.01% and ND 6 filters only 0.0001% of the light available.
That’s where grey filters come in. Grey filters or ND filters (meaning neutral density) consist of coated glass or epoxy resin and can usually be screwed on to the front element of your lens. These filters block a big proportion of the available light which results in a longer exposure time, enabling photographers to get the intended motion blur. ND filters are available in various versions: ND 2 filters will transmit just 1%, ND 4 filters 0.01% and ND 6 filters only 0.0001% of the light available.
But sometimes even
such ND filters are not dark enough and since they can
also be
quite expensive, here’s an easy and cheap do-it-yourself
option: use a
welding
glass.
Welding glasses are
normally used in welding helmets for metal processing: they
are
protecting the
worker's eyes from the ultra-bright light of the welding
flame.
Because of this, welding glasses are very restrictive,
blocking the
vast majority of light. Moreover, they are very cheap and
you can get
them in
almost every hardware store or via Amazon.
So we bought two
different welding glasses, a very opaque and an even darker
one.
Since we wanted to be able to easily screw the filters on
our lenses,
we also bought some adapter-rings (77mm and 67mm step-down
rings from
enjoyyourcamera.com). We then just glued the filters
onto the
glass using household-glue (Uhu Alleskleber). You
want to make
sure that there's no light leaking in from between the glass
and the
filter, otherwise the filter has no effect.

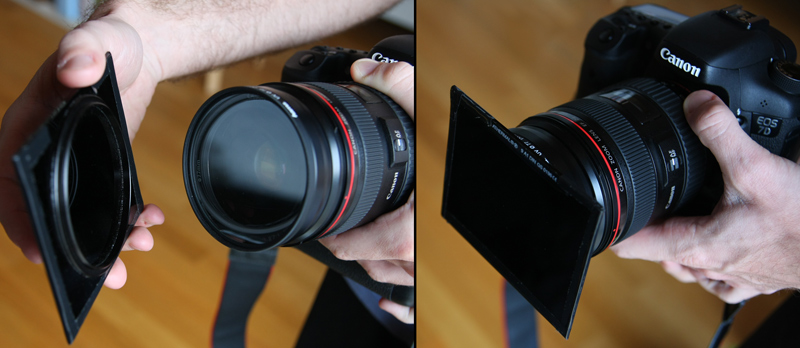
Quick
&
easy
use
of
the
screw-on grey filter.
With this setup, we
can now take long-time exposures during the mid of the day.
But as
for all long time exposures, prevention of camera shake is
crucial –
usage of a tripod is therefore mandatory. A remote control
cable-release can also help keeping your camera steady, but
a
self-timer combined with mirror
lockup
does the job as well.
Due to the fact that
such grey filters block the bulk of available light, your
viewfinder
is going to be very dark indeed and the AF of your camera
won’t
work. But for landscape photography, using manual focus is
not an
issue.
You can also first compose your image normally using
AF, then
screw on the grey filter and take pictures.

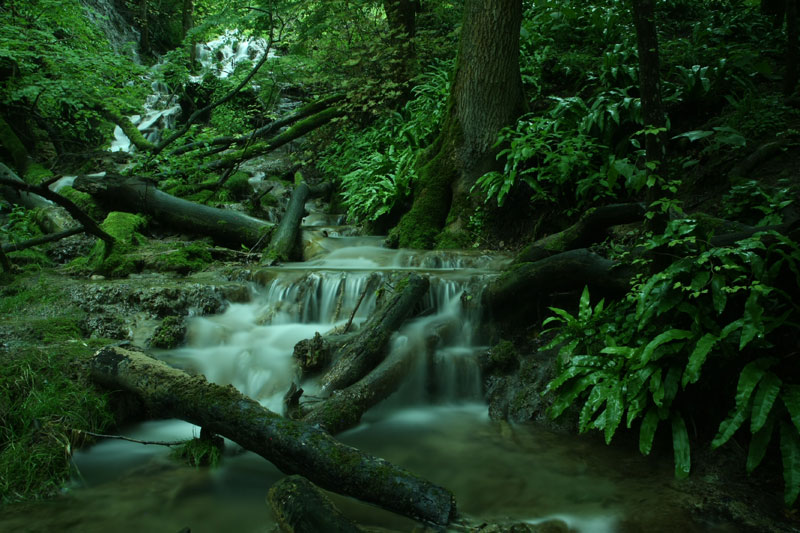
Another
woodland
creek.
40
sec.
exposure
time,
f9.
Germany
2010
Since welding
glasses are not originally designed for photographic use,
their
colour reproduction is far from neutral: our copies display
quite a
greenish tint. However, this can be fixed easily either
during
post-processing or by using a manually set white-balance. My
preferred
method is first taking a (greenish) picture and then just
use that
image as
a reference for your manual white-balance (check your
camera’s
manual for the exact procedure).

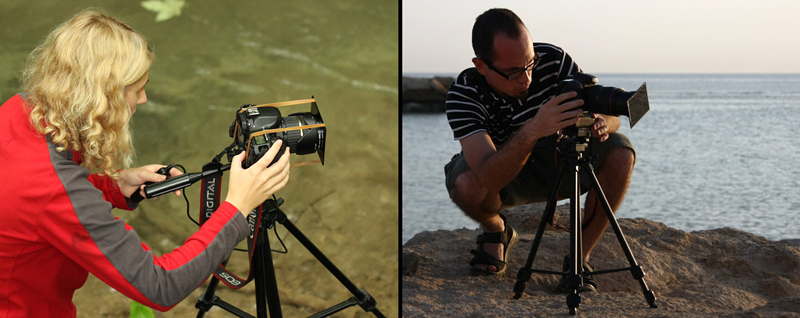
Grey filters in use. Simple
rubber-band version (left) and screw-on mount (right).
We hope you have fun taking some nice long-time exposures!
We hope you have fun taking some nice long-time exposures!
